How To Compress A Memory Foam Mattress At Home

Mattress-in-a-box companies have made buying a new bed a breeze. After a search online, you can order a new memory foam mattress and get it delivered right to your doorstep. These beds are simple to move and setup. However, they’re not as equally easy to compress and re-roll later, should you have to move your mattress.
Mattress companies use factory-grade machinery and vacuum hose to push your bed flat while maintaining its structural integrity. While people in the past have successfully managed to roll their memory foam mattresses down to its original packaging size at home, it’s not recommended and can void your warranty.
The biggest risk of re-rolling your memory foam mattress is the potential damage to the foam. Rolling a memory foam mattress can create uncomfortable lumps or creases in the bed, compromising support. Plus, there’s a chance your mattress won’t pop back up to its proper shape, and you’ll be out a bed.
Though it’s not recommended you have a rolled mattress or fold your mattress, there are still ways to conveniently DIY compress and transport your bed if you need to. In this guide, we’ll break down everything you need to know for how to compress a memory foam mattress.
1. Gather your materials
Plastic Mattress Bag
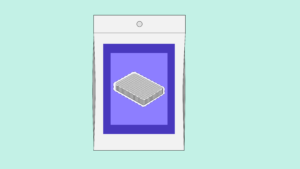 Plastic memory foam bags cost only a couple of dollars and can be bought at bedding retailers or storage facilities such as U-Haul.
You put your memory foam mattress in these durable bags to protect them from damage. Additionally, if your bed has a mattress protector, we recommend keeping it on while you move for extra protection.
Make sure you buy a mattress sealable bag compatible with your bed’s size. If you have a Queen size mattress, choose a Queen bag— a King size bag will have too much extra material while a Full size will be too small.
Duct Tape
 Whoever coined the phrase “Duct tape can fix anything” wasn’t wrong. This heavy-duty tape is extremely versatile, and it can help with your bed-moving situation, too.
Use duct tape to secure your memory foam mattress bag shut. It helps to buy a sealable plastic mattress bag, too. Duct tape reinforces the seal and allows for better compression. If you don’t have duct tape, packing tape is a decent substitute.
Vacuum Bag
 You won’t be using the actual vacuum bag for this process; you just need the valve attached to it. It doesn’t matter what size bag you choose, but make sure the size of the valve fits your vacuum’s hose.
These can be found at Walmart, Target, or Amazon.
Vacuum Cleaner
 You can use a shop vac or a regular old vacuum cleaner to compress your memory foam mattress. As we said above, double-check to ensure the valve you want to use is compatible with your vacuum.
Ratchet Straps
 Ratchet straps, sometimes called tie-down straps make moving the mattress as easy as it can be. These give you something sturdy to hold onto when it comes time to lift and carry your bed.
You can find ratchet straps at Target or Walmart, and they usually only cost a few dollars.
2. Remove your bedding
 Now that you’ve got everything you need, it’s time to remove your bedding.
For the sake of convenience, you’ll want to move the mattress by itself without any bedding on it. You can store your sheets, comforters, and pillows in a sealed storage container or another vacuum-sealed bag for safe transport.
Remember, if you have a memory foam mattress protector on your bed, don’t remove it. Keeping it on your mattress acts as an extra layer of protection from damage. However, the same cannot be said of a mattress pad or topper.
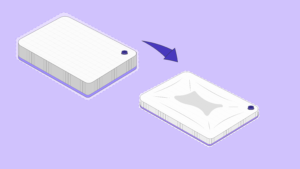
3. Place your bed in the plastic mattress bag
 If you bought the right size mattress bag, your bed should fit like a glove. Once you’ve got your bed securely inside, seal up the bag.
If you bought a sealable mattress bag, you should be able to seal it shut like you would any plastic bag. After you successfully seal it, use a few strips of duct tape to reinforce the seal.
Should the seal of the bag break while you’re moving your bed, the duct tape acts as a back-up to keep things from going south.
If the plastic mattress bag you bought doesn’t have a seal, that’s okay, just make sure to use quite a bit of duct tape to make sure the plastic bag is securely shut.
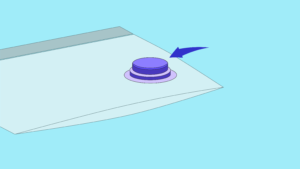
4. Attach the valve
 After your mattress is sealed inside the plastic bag, you can attach the valve from the vacuum bag.
Start by removing the valve from the vacuum bag you bought. Then, place it on your plastic bag and draw an outline. Next, cut a hole in your plastic bag around the outline, so it’s the exact size of your vacuum bag valve.
After you’ve cut a hole in your mattress bag, place the valve through the hole until it reaches the surface of your bed. Then, tape the hole shut, making the bag as airtight as possible. You don’t have to worry about using too much duct tape for this step— the more secure, the better.
5. Vacuum the air out
 Once the valve is securely attached to your plastic mattress bag, connect your vacuum hose and turn it on. Then, you can sit back and watch your mattress flatten before your eyes!
Not only is it more convenient to keep your mattress flat on the floor while you follow this step, but it’s also the best way to compress your bed. A flat mattress allows for more even compression and decreases your risk of damaging the foam. If you can, avoid vacuuming the air out while your bed is standing on its side.
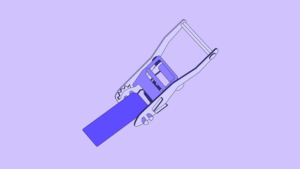
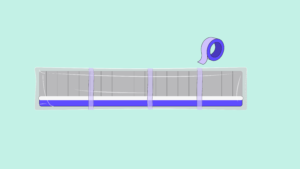
6. Attach the ratchet straps
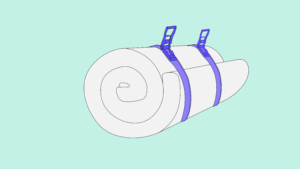 While compressing a mattress does reduce its size, it doesn’t necessarily make it any easier to pick up and maneuver. Attaching ratchet straps or mattress moving straps to your bed gives you a handle to hold onto and makes an otherwise cumbersome job rather simple.
You attach ratchet straps by wrapping them tightly around the entire width of your mattress and threading the buckle. These also double as compression reinforcement, keeping your bed secured should the seal of your mattress bag break.
Can You Compress Other Mattress Types?
Compressing a mattress makes transporting it much more convenient because it saves quite a bit of space in the moving van, and it’s significantly less difficult to pick up and carry. However, not all mattresses can be vacuumed flat.
The easiest beds to compress are foam, such as memory foam or latex mattresses. These are usually the most common mattress-in-a-box types because many bedding brands believe foam is the safest to flatten.
Many online mattress brands hesitate to compress hybrid or innerspring beds due to the damage it can do the coil system inside. While these beds indeed can be flattened out, it’s risky— so many brands choose to deliver White Glove instead. White Glove carriers not only bring your mattress to your doorstep but also set it up in the room of your choice. They also dispose of the packaging your new bed comes with, making setup completely hassle-free.
While offering free White Glove delivery to customers can be pricey, it’s more cost-effective than having to pay for the return shipping of a defective mattress and fulfill warranty claims.
When it comes to bedding accessories such as memory foam mattress toppers or box springs, these same rules apply. Products with springs inside should not be compressed, while foam accessories are safe to flatten along with your mattress if needed.
Are You Ready to Compress and Move Your Mattress?
When the day comes to move your mattress, follow our six simple steps to make matters a little less complicated. Just keep in mind, while compressing your foam bed is okay, attempting to re-roll or fold it up is a risky move. While a rolled-up mattress may save more space, or make the process a bit easier, you risk ruining your bed in the process of doing so.
You may also need to follow the same rule of waiting 24 hours before sleeping on a memory foam mattress once you set up your memory foam mattress in your new home. It takes time for a mattress to uncompress and it won’t be fully comfortable until it finishes expanding.